
Controlling litter box odor comes down to three proven actions: scooping waste twice daily, using clumping litter with activated charcoal or baking soda, and placing the box in a well-ventilated area. These steps eliminate smell at the source rather than masking it, and they take less than five minutes per day once you establish a routine.
If you’ve noticed that familiar ammonia scent creeping through your home, you’re not alone. Nearly every cat owner faces this challenge, and it’s nothing to feel embarrassed about. Cats are wonderful companions, but their bathroom habits require consistent attention to keep your living space fresh and welcoming for both family and visitors.
The good news? You don’t need expensive automated systems or a closet full of air fresheners to solve this problem. What you do need is the right combination of materials, a simple daily habit, and an understanding of what actually causes litter box odor in the first place. Urine breaks down into ammonia compounds within hours, and solid waste harbors bacteria that intensify smells. Stop the breakdown process early, and you stop the odor before it starts.
Whether you’re caring for one beloved cat or managing multiple litter boxes as a foster volunteer, the principles remain the same. This guide walks you through everything you’ll need and exactly how to use it, so you can reclaim your home’s fresh-smelling atmosphere today.
What You’ll Need for Effective Odor Control
Starting with the basics will set you up for success without breaking the bank. You don’t need expensive equipment to keep odors under control, just the right few essentials and a willingness to stay consistent.
Your core supplies include a sturdy litter scoop with metal construction (plastic tends to absorb odors over time), unscented clumping litter that forms tight clumps for easy removal, and small trash bags with handles for quick disposal of scooped waste. A dedicated trash can with a tight-fitting lid near the litter box area prevents odor from spreading when you dispose of clumps between outdoor trash runs. You’ll also need a pet-safe cleaning solution, either an enzyme-based cleaner specifically made for pet messes or simple unscented dish soap and white vinegar, for weekly deep cleaning.
- Metal litter scoop with slotted design
- Unscented clumping litter (3-4 inch depth per box)
- Small trash bags or waste disposal system
- Enzyme cleaner or dish soap and white vinegar
- Microfiber cloths or paper towels for wiping
- Litter mat to catch tracking (optional but helpful)
- Baking soda for sprinkling under litter (optional)
- HEPA air purifier for the litter box room (optional)
- Extra litter boxes for multi-cat households
The optional upgrades truly shine in multi-cat or foster situations. A textured litter mat placed under and in front of each box catches scattered litter before it spreads through your home. An air purifier with a HEPA filter placed in the same room as the litter boxes continuously filters airborne particles and odors. Some folks swear by sprinkling a thin layer of plain baking soda at the bottom of a clean box before adding litter, though this step isn’t necessary if you’re scooping daily.
For those fostering multiple cats or managing several boxes, consider buying supplies in bulk and keeping a second scoop so you’re never caught without one during cleaning. The investment pays off quickly in both time saved and odors prevented.
Important Safety Considerations
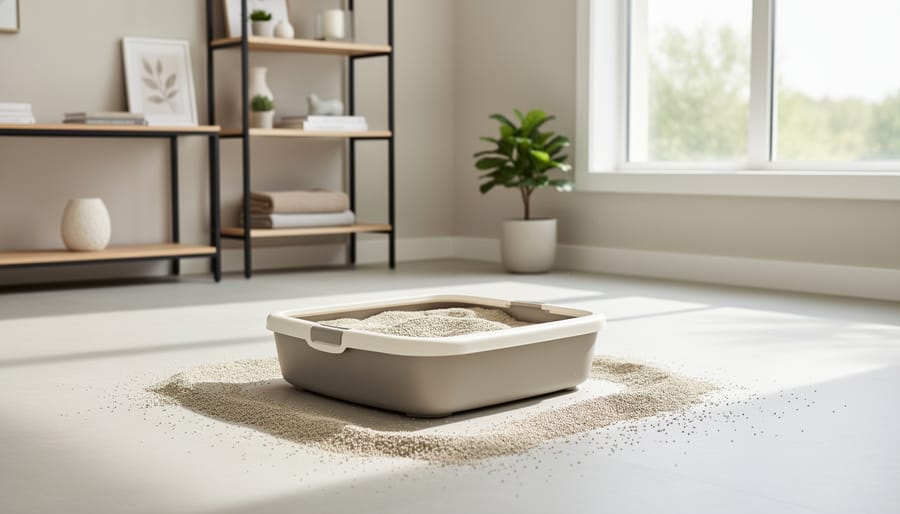
Before tackling odor, protecting your cat’s health comes first. Many popular products and approaches can cause serious respiratory distress, skin irritation, or even toxicity in cats, especially kittens and those with existing sensitivities.
Stick with fragrance-free dish soap, white vinegar diluted with water, or enzyme-based cleaners specifically labeled pet-safe. When washing boxes, rinse thoroughly and let them dry completely before refilling, soap residue can irritate paw pads and discourage use.
Heavily scented litters, even those marketed as “fresh” or “perfumed,” often overwhelm a cat’s sensitive nose and drive them to eliminate elsewhere. Cats have roughly 200 million scent receptors compared to our five million, so what smells pleasant to you may be unbearable to them. Choose unscented or very lightly scented clumping litters instead.
Covered or hooded boxes might seem like odor solutions, but they trap ammonia fumes at cat-nose level, creating a toxic breathing environment. This is particularly dangerous for kittens, senior cats, and those with asthma or upper respiratory issues common in rescue populations. Open boxes with good airflow are always safer.
Finally, plug-in air fresheners, scented candles, and automatic spray deodorizers can irritate feline respiratory systems. If you need help with room freshness, open windows for ventilation or use a HEPA air purifier designed for pet odors, just position it away from the boxes so cats don’t feel exposed while using them.
Step-by-Step Odor Control Process
Step 1: Choose the Right Litter and Box Setup
Odor control starts before you ever scoop a single clump. Your choice of litter and box placement creates the foundation for a fresh-smelling home.
Clumping litter wins for odor control because it traps urine in solid masses you can remove daily, preventing ammonia buildup. Clay-based clumping varieties absorb moisture quickly, while natural options like corn, wheat, or walnut offer plant-based odor neutralization. Non-clumping litter requires complete changes more frequently and allows urine to pool at the bottom, where odor intensifies.
Skip heavily scented litters, they often mask smells temporarily but overwhelm sensitive cat noses, sometimes causing cats to avoid the box entirely. Unscented or lightly scented formulas work better long-term and won’t interfere if you need to train your cat or a new foster.
Place boxes in well-ventilated areas away from heating vents and damp basements. Good airflow prevents ammonia concentration. For multi-cat homes, follow the one-plus-one rule: one box per cat, plus one extra. Three cats need four boxes spread across different locations, not clustered together.
Choose uncovered boxes when possible, they allow better ventilation and give cats escape routes, reducing stress-related elimination problems.
Step 2: Scoop Daily (or Twice Daily)
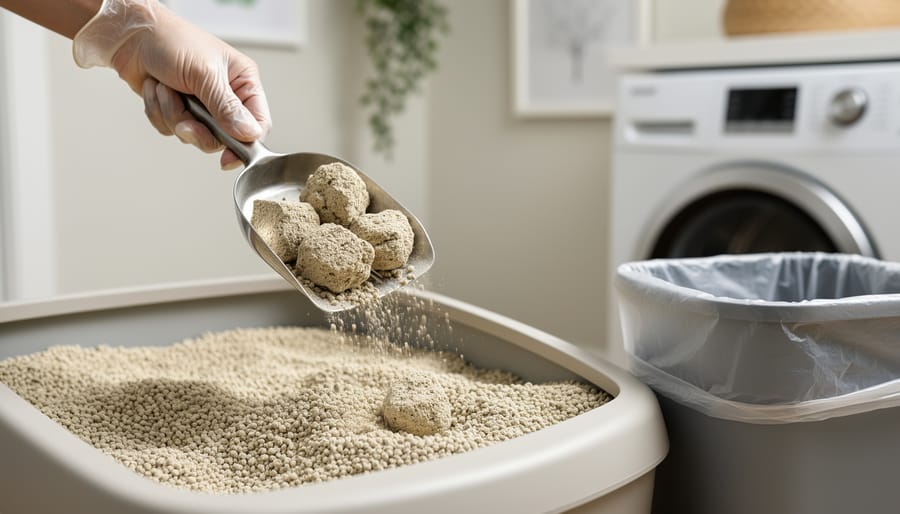
Scooping removes the primary source of odor before it has time to intensify. For most single-cat households, once-daily scooping works well, ideally at the same time each day so it becomes routine. If you’re fostering multiple cats or notice lingering smells, switch to twice daily (morning and evening).
Use your scoop to sift through all the litter, not just the surface. Clumps hide beneath the top layer, and urine can pool at the bottom against the box. Lift out solid waste and clumps completely, breaking them apart releases ammonia back into the litter. Check corners and edges where cats often aim.
Immediately seal waste in a plastic bag or dedicated lidded container. Leaving scooped waste sitting in an open trash can allows odor to spread throughout your home. Some foster families keep a small diaper pail near the litter area for quick, odor-locked disposal.
If you’re consistently scooping but still smell ammonia, you likely need to increase frequency or perform a full litter change sooner than planned.
Step 3: Top Off and Maintain Litter Depth
Maintaining proper litter depth directly impacts odor control. Aim for 3-4 inches of litter in each box, enough for cats to dig and cover waste while creating sufficient material for clumping and absorbing moisture.
As you scoop daily, you’ll remove clumps along with some surrounding litter. When the depth drops noticeably (typically every few days), add fresh litter to restore the original level. Pour it gently to avoid creating dust clouds, and smooth it evenly across the box.
In multi-cat homes or foster situations, you may need to top off every other day. The litter should never be so shallow that urine reaches the bottom of the box, that’s when odors really take hold and cleaning becomes much harder.
Step 4: Perform Weekly Deep Cleaning
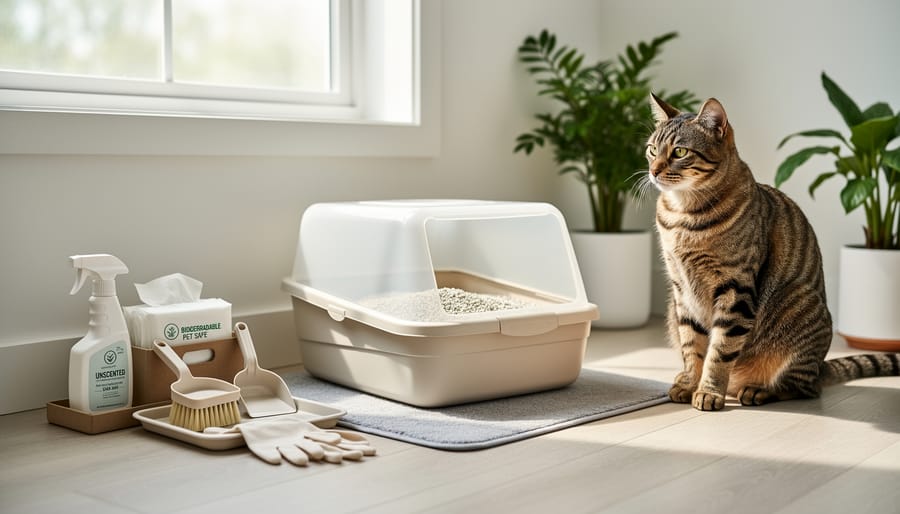
Once a week, give each litter box a complete refresh to prevent odor buildup that daily scooping can’t address. This deep clean removes residual waste particles, urine crystals, and bacteria that accumulate on box surfaces over time.
- Empty all litter into a trash bag, scraping out any stuck clumps from corners and seams.
- Rinse the empty box with warm water to remove loose debris and dust.
- Wash the entire box with mild dish soap or a pet-safe enzymatic cleaner, scrubbing all interior surfaces, edges, and the bottom. Avoid bleach or ammonia-based products.
- Rinse thoroughly until no soap residue remains, as cats may avoid boxes that smell like cleaning products.
- Dry the box completely with a clean towel or let it air-dry in a well-ventilated area. Even slight dampness causes fresh litter to clump prematurely.
- Refill with 3-4 inches of fresh litter.
For multi-cat homes or foster situations, consider keeping an extra box so you can rotate them during cleaning. While one box dries completely, the backup stays in service. This approach prevents rushed drying or the temptation to skip deep cleaning when time is tight. Some foster caregivers assign boxes to specific areas or cat groups, making rotation easier to track and ensuring every box gets proper attention weekly.
Step 5: Address the Surrounding Area
Even the cleanest litter box creates a zone of potential odor around it. Cats track litter on their paws, and microscopic waste particles settle on nearby surfaces. A litter mat catches most tracked debris, shake it outside or vacuum it every few days, and wash it weekly with pet-safe detergent. Wipe down walls within two feet of the box using a damp microfiber cloth and mild cleaner; ammonia residue clings to painted surfaces and amplifies odors over time.
Vacuum the floor around the box at least twice weekly, paying attention to corners where litter collects. If your cat is an enthusiastic digger, you’ll find litter farther than you’d expect. For foster homes with multiple boxes, consider a small handheld vacuum dedicated to this task.
Don’t forget your waste disposal system. If you use a dedicated trash can for scooped waste, empty it every two to three days and wash the can itself weekly. Leaving bagged waste in a garage or outdoor bin prevents indoor odor buildup. These perimeter habits close the gaps that scooping alone can’t address.
Step 6: Monitor and Adjust Your Routine
Your routine should evolve with your household. Check for lingering odors each week, if you’re noticing smells between scoopings, increase frequency or switch to a higher-quality clumping litter. Homes with multiple cats or those involved in temporary cat fostering often need twice-daily scooping and more frequent full changes. Hot, humid weather intensifies odors, so consider adding an extra box or boosting ventilation during summer months. Watch your cats, too, if they start eliminating outside the box, the issue might be cleanliness rather than behavior.
How to Tell If Your Odor Control Is Working
The most reliable test is simple: walk into the room with fresh perspective. Leave your home for an hour, then return and notice what you smell immediately upon entering the space where the litter boxes are kept. You shouldn’t detect strong ammonia odors or an overwhelming cat smell, just a faint earthy scent at most. If you’re nose-blind from constant exposure, ask a trusted friend or family member for honest feedback when they visit.
Watch your cats’ behavior closely. When odor control is working, cats use their boxes readily without hesitation, scratching, or circling excessively before eliminating. If a cat suddenly starts avoiding the box, eliminating nearby, or spending less time covering their waste, the box may smell too strong to them even if you don’t notice it yet.
Visual inspection matters too. Check for accumulated waste stuck to box sides, litter that looks saturated or discolored, or clumps breaking apart when scooped. These signs indicate it’s time for a complete litter change, even if your schedule says otherwise.
Pay attention to the type of odor you detect. A mild, earthy smell is normal. Sharp ammonia that stings your nose, unusually foul-smelling feces, or sweet-smelling urine can signal health problems like urinary tract infections, kidney issues, or diabetes. If you notice these concerning odors along with changes in your cat’s drinking, eating, or elimination habits, schedule a veterinary visit promptly.
When Odor Persists: Troubleshooting Common Problems
When you’ve followed all the cleaning steps and odor still lingers, don’t worry, you’re not doing anything wrong. Persistent smells usually point to specific issues that need targeted solutions.
If you have multiple cats, count your boxes. The rule is one box per cat plus one extra. Three cats need four boxes minimum. Overcrowding forces cats to use soiled spots repeatedly, overwhelming even the best litter’s odor control. Adding boxes often solves what seems like an impossible smell problem.
Unusually strong or foul-smelling waste can indicate a medical issue. If your cat’s urine suddenly smells intensely of ammonia, or their feces has a particularly offensive odor, schedule a vet visit. Urinary infections, kidney disease, and digestive problems all create distinctive smells that no amount of cleaning will fix without addressing the underlying health concern.
Some cats simply won’t use certain litter types effectively. If you’re scooping daily but still smell urine, the litter may not be clumping properly for your cat’s habits. Try switching to a different clumping formula or increasing the depth to 4-5 inches.
Box placement matters more than most people realize. Boxes in damp basements, enclosed closets, or poorly ventilated bathrooms trap odors. Moving them to areas with better airflow often brings immediate improvement.
Finally, check for urine that’s soaked through into flooring or drywall, especially if you’ve had boxes in the same spot for years. Sometimes the box itself is clean, but the area underneath needs treatment with an enzymatic cleaner designed for pet odors.
Frequently Asked Questions
How often should I replace the actual litter box?
Plan to replace plastic boxes every 12-18 months, as scratches and porous surfaces absorb odors that cleaning can’t remove. If you notice lingering smells even after thorough washing, or visible cracks and scratches, replace the box sooner.
Is baking soda safe to use in cat litter?
Yes, a light sprinkling of plain baking soda mixed into litter is generally safe and helps neutralize odors. Avoid heavy-handed use, though, as some cats dislike the texture or may inhale dust when digging.
Do air purifiers actually help with litter box odor?
Air purifiers with activated carbon filters can reduce airborne odor particles, especially in small spaces. Place the unit near (but not directly next to) the litter area for best results, and remember it supplements but doesn’t replace proper scooping and cleaning.
How can I control odors in a small apartment?
Position boxes near windows or vents for airflow, use unscented clumping litter with strong odor control, and scoop at least twice daily. A litter mat and small waste bin with a tight lid right next to the box prevents odor spread.
What works for foster homes managing multiple litters at once?
Follow the one-plus-one rule strictly, establish a schedule for rotating through boxes, and consider dedicated foster supplies separate from your own cats. Many foster families doing rescue volunteer work find success with disposable boxes for short-term placements, and organizations like Lincoln Pet Volunteers can often provide supplies and guidance.
These questions come up frequently because odor control looks different depending on your living situation and how many cats you’re caring for. The answers that work for a single cat in a house won’t necessarily translate to a studio apartment or a foster home with rotating animals, so don’t hesitate to experiment and adjust based on what your specific setup demands.
With a little daily effort and the right approach, you can absolutely keep your home fresh and odor-free while giving your cats the clean environment they deserve. The routine might feel like a lot at first, but it quickly becomes second nature, and the difference it makes is worth it.
Whether you’re caring for one beloved companion or fostering multiple cats through Lincoln Pet Volunteers, mastering litter box odor control creates a healthier space for everyone. For foster families especially, maintaining fresh, welcoming conditions helps cats feel comfortable and increases their chances of finding permanent homes. After all, potential adopters notice these details during visits.
Your commitment to managing odor control doesn’t just improve your living space. It’s an act of care that benefits the cats in your life and supports the broader mission of rescue work in our community.